Lace and Embroidery Need Detail
A floral impression is not enough when the design is the product. Build a reference and review plan around openwork, thread relief, borders, and lining.
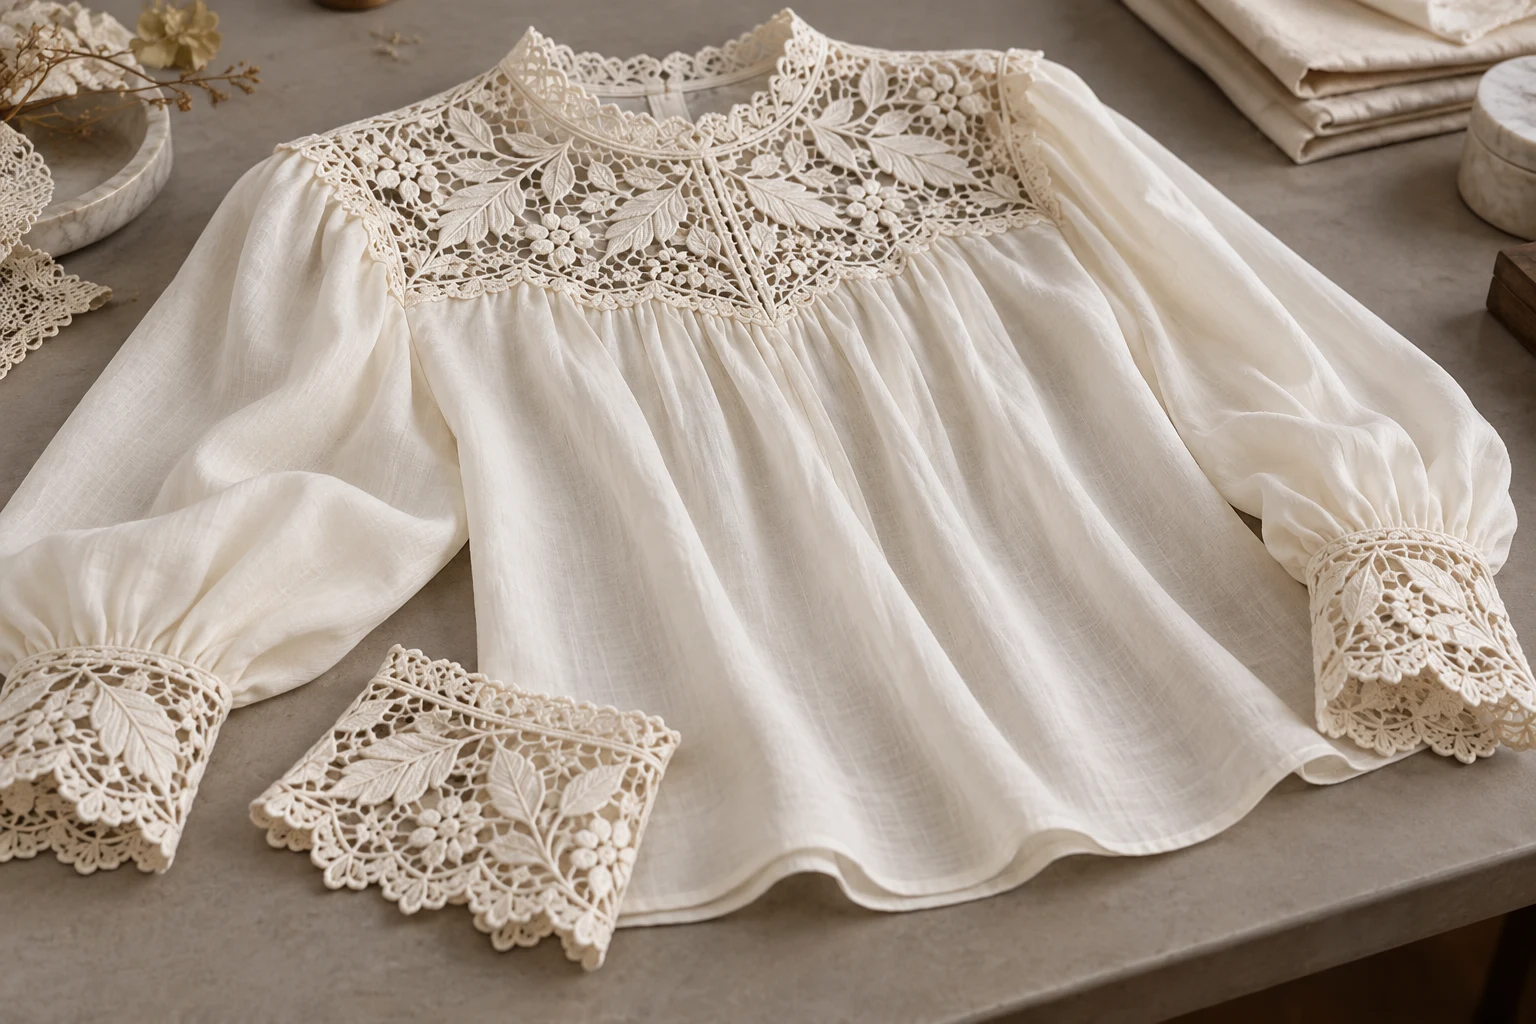
Review the design’s structure, not just its decorative mood.
An embroidered lace blouse may look convincingly delicate while its actual motif has changed. Start by naming what identifies this item: a leaf arrangement, scalloped border, repeated flower, sheer panel, or raised stitched area. Those features become the review landmarks. A generic floral surface should not substitute for the supplied design merely because it feels appropriate.
Keep the general garment shape in the same review. The yoke must meet the correct neckline and sleeve construction, and the decorated area must occupy the intended part of the blouse. A detailed close-up cannot establish placement by itself. Use it together with the overall reference, so the decoration remains connected to the actual product.
Separate Lace from Embroidery
Lace openings, thread relief, and the underlying material carry different information.
Openwork
Openwork
Inspect openings and the surrounding thread.
Embroidered relief
Embroidered relief
Compare motif and material transition.
The Metropolitan Museum describes needle and bobbin lace as distinct thread-based constructions. The V&A’s embroidery collection presents a range of stitched techniques. These sources help explain why a decorative impression alone is an incomplete description: openings, dense thread areas, and the supporting fabric deserve separate attention in a garment reference.
In the illustrated blouse, use the lace edge as one landmark and an embroidered botanical area as another. In your own product, select features with a clear reference rather than counting an indistinct mass of tiny stitches. The purpose is to identify commercially meaningful differences, not to claim that every visible thread has been independently measured.
[1] The Metropolitan Museum of Art[2] Victoria and Albert Museum
Show the Thread Relief
Choose a detail view that reveals the decoration and its immediate surroundings.
- Motif
- Recognizable arrangement and scale.
- Border
- Scallop or edge character.
- Relief
- Thread and base material.
- Lining
- What sits behind the openwork.
Adobe’s texture guide discusses directional and diffused lighting for revealing surfaces. Apply that idea carefully to the reference session: find a light direction that makes the embroidery readable while preserving the fabric beneath it. A bright reflection can hide thread detail; an excessively dark shadow can make openwork look like a solid patch.
Keep the material at a useful angle and focus on the feature that matters. Show the transition from decorated to undecorated cloth when it is part of the design. If metallic or glossy thread behaves differently from the main fabric, add a dedicated reference rather than forcing one exposure to explain every surface equally.
Inspect Behind the Lace
A change in lining can change the visible product, even if the motif looks similar.
Motif inspection area
Border and construction area
Two inspection crops from one conceptual photograph, not a before/after test.
Record whether the photographed lace lies over lining, another garment, skin, or the background. Keep the source arrangement explicit. An opaque fill in an intentionally sheer panel, or an invented opening in a lined section, changes more than the mood of the image. It changes what the customer can reasonably understand about the construction.
Do not infer unseen lining from a styled reference. If the front view does not explain the panel, add an inside or detail photograph that does. For a campaign composition, hands or hair may cover the transition. Retain a separate product-led view in which the lining edge or sheer area can actually be assessed.
Map Motifs and Placement
A short reference kit keeps the small feature attached to the whole garment.
- Whole
- Locate the panel on the garment.
- Close
- Show the motif and thread.
- Support
- Clarify lining or the reverse.
- Review
- Compare the same product revision.
Use the front view for the overall yoke position, a detail for the botanical motif, and another view for the scalloped cuff or back panel when required. Name each image by its job. Keep the same garment revision throughout: a sample blouse with an earlier embroidery layout is not interchangeable with the final production item.
Write a factual note such as botanical embroidery on the yoke, scalloped sleeve edge, and supplied lining arrangement. Avoid describing the product only as romantic or luxurious; those words do not identify the pattern. Keep the original photographs available so a reviewer can resolve uncertainty by looking at the product, not by interpreting styling language.
Keep Decoration in View
The starting direction should help you inspect the feature you are selling.
Choose a model
When the selected scene needs one.
Add your product
Use the clear garment reference.
Choose a ready scene
Start with visible pose, light, and framing.
Generate and inspect
Review the product before approving.
In Studiola Lookbook, choose a model when needed, add the blouse, and select a ready scene. The visible pose, lighting, and framing help settle the creative starting point without writing a basic prompt. Prefer a composition that keeps the yoke, cuff, or other important decoration clear enough to review against the source.
The prepared direction helps reduce setup decisions; it does not guarantee preservation of lace or stitches. TRY ON is a lower-credit-cost alternative for more open scene exploration, which may require additional pose and direction decisions. Whichever route you use, revise a named difference such as an opaque panel or changed border rather than requesting more detail in general.
Approve Garment and Decoration
Keep uncertain features visible in the decision instead of treating plausibility as proof.
Design
Motif and border describe the supplied item.
Construction
Lining and decorated panels remain appropriate.
Evidence
Important small details have a clear original reference.
Compare motif arrangement, border character, panel placement, and lining where the final view shows them. Allow for the way folds and perspective change their visible shape. A curved border on a sleeve is not automatically a different design, but a new floral motif or missing panel needs a specific explanation or another result.
If the final composition is too distant to support a small-detail claim, accompany it with an original detail photograph. Keep the reference kit in the production handoff. This lets the team use a creative image for atmosphere while retaining a clear record of the actual workmanship, without presenting an illustrative output as a verified textile reconstruction.
Sources, method & questions
Published · By Studiola Editorial Team
Frequently asked questions
Is a similar floral pattern an accurate match?
Not necessarily. Compare the supplied motif, border, placement, and construction rather than relying on the overall decorative impression.
Should lace look identical in a flat lay and on a body?
Not pixel for pixel. Perspective, folds, and what sits behind it change the appearance; the product’s underlying design should remain recognizable.
What if the final image cannot show individual stitches?
Use an original detail photograph for workmanship information and avoid claiming the distant creative view verifies every stitch.
How this guide was researched
Studiola editorial guide informed by the linked primary sources, accessed October 23, 2026. Practical reference and review recommendations are editorial guidance, not measured model performance. Photographs are AI-created illustrations; diagrams explain the process. No independent benchmark or accuracy guarantee is claimed.
Sources & further reading
- 01Textile Production in Europe: Lace, 1600–1800
The Metropolitan Museum of Art · Primary source · Checked
- 02Embroidery
Victoria and Albert Museum · Primary source · Checked
- 03What is texture in photography?
Adobe · Primary source · Checked
Give the garment a clear starting point
Bring your own product to a ready Lookbook scene, then inspect the details before publishing.